Firstly, it’s the only way a potential customer can gauge a product. When you shop online, you can’t pick a product up and look at it from various angles. You can’t smell it or touch it. The only sense you can use is your sight.
Increasing sales: People who shop online tend to process visual information better than text. It’s quicker and they tend to remember the image for longer. Therefore, if your images are good quality they will imprint on the minds of potential customers and improve the chances of them making a purchase.
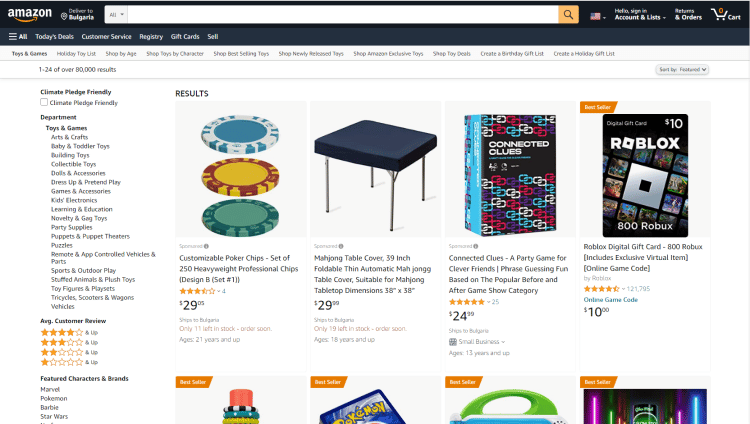
The main images you want to upload have more restrictions than secondary images, but even so, you can get creative if you want to.
Drawings or illustrations are not allowed, only cover art or professional photographs. There must be no additional objects in your picture as these can be confusing for the customer. The product must be in focus, lit professionally, photographed, or scanned. The color must be realistic and the edges of the image smooth. If the product is a book, music CD, DVD, or video CD, you must use front cover art for the main image and must fill 100% of the frame. The ideal image size is 85% to 90% of a photo frame. The image background must be pure white (RGB 255,255,255). Accessories or props that aren’t included in the product shouldn’t be used. You are not allowed to include additional graphics, logos, text, watermarks, color blocks, borders, or inset images. Products must be shown outside of any packaging, bags, cases, or boxes unless they are an important product feature. Human models shouldn’t be sitting, leaving, lying down, or kneeling. Multi-pack accessories and apparel items must be flat and not on a model. Clothing for men and women should be photographed on a human model. Baby and children’s clothing must be flat and off of a model. Clothing accessories should not show any part of a mannequin. Shoe images must include a single shoe photographed facing left at a 45-degree angle. Multiple views are not permitted. Offensive and pornographic material are prohibited. File formats you’re permitted to use include JPEG (.jpeg/.jpg), GIF (.gif), TIFF (.tif/.tiff), and PNG (.png).
Secondary Image Requirements
Secondary images are any other pictures customers can see when they click on your result and view a particular product page. The purpose of secondary images is to make a sale. Image guidelines for secondary images are similar to the guidelines for main images, except for the following:
You can include additional objects or other products if they help to demonstrate a product’s value. Backgrounds don’t have to be pure white. Demonstrative graphics and text can be added if you need to highlight the features of a product. Images can be cropped and closed up.
PRO TIP You’ll also see EBC referred to as A+ content. EBC images have to follow the usual guidelines, but there is the option to include long text if it will help explain the value of a product. In addition, the following apply:
File extensions that are allowed include BMP, PNG, and JPG. Images have to be clear with no watermarks. The images also have to be readable for anyone using a mobile device. Any images used on an A+ content page must be different from the main and secondary product pages.
LEARN HOW TO MAKE $10K PER MONTH Get My Book For FREE (Worth $15 on AMAZON)Take Advantage Of This Special Offer Only For Today! Get my $15 book for FREE when you subscribe to my newsletter and I will show you the way to your first $10k month in less than one year. Name Best email Yes, Send Me The Book!
The following best practices will help you achieve your goal:
1. Focus on Your Main Image
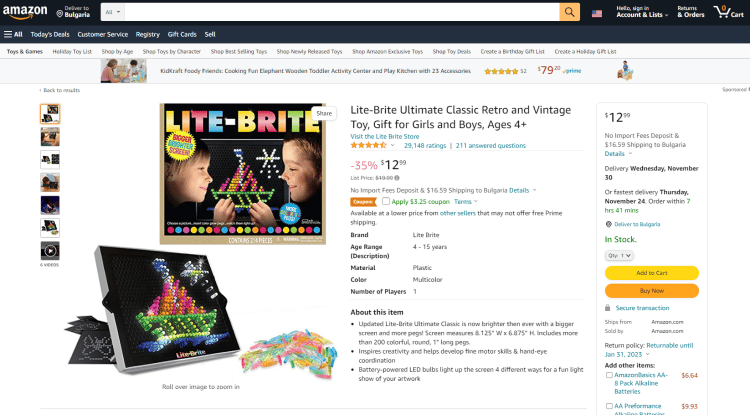
Your main image is the most important part of your product listing. It should show a potential customer what the product looks like when they take it out of the box. If you can get this image spot on, it has the potential to boost your bottom line big time. It must stand out and catch buyers’ attention. Something else to remember is that your main image is the one that will appear in Google results. All the more reason to make sure it’s the best image possible. You can make the main image count by doing the following:
Using clear, bold, and bright images that encourage potential customers to click through and view your full listing. Check out the main images of your competitors to see whether there are any weak spots you can improve upon. Hiring a professional photographer is a worthwhile investment. At the very least, use them for the main image and a few secondary snaps.
Secondary images, on the other hand, help to sell your product by focusing on its benefits and top features. You have the opportunity to show a product being used or photographed in a relevant environment. You can also show it from various angles. Essentially, the aim is to allow a customer to pick up and inspect an item, but virtually. Secondary images are the ideal chance to build a brand and be creative.
2. Use All The Available Image Space
It’s down to you to make the most of this space and prioritize your images accordingly. Prioritize your product images in the order you want the customer to see them and use all slots rather than just a few. That way, you’re overcoming a massive disadvantage so many online retailers face. You can’t put the product in a customer’s hand but you can try to replicate the hands-on experience digitally. Try the following to improve your images:
Take photographs from multiple angles to show off your product fully. Models will help potential customers picture themselves wearing or using your product. Show your product being used in the right setting, whether that’s indoors or outdoors. For example, if your product is a dog lead, show someone using it while they’re walking their dog outside. Similarly, if you’re selling a frying pan, include an image of a person frying an egg on a stove. You can ramp up the visual experience by mixing up product backgrounds (however, this is only permitted with secondary images). Overlaid dimensions, videos, and infographics will help massively if they’re applicable. For example, if you’re selling food supplements, an infographic showing nutritional information will be very useful.
3. Add Text
If you want to highlight specific product information, a good way to do it is with additional text. Try to create a unique brand look and feel by using the same fonts and colors. Use text for the following:
Highlighting important product benefits and features. Providing specifications such as size, and dimensions. List any materials that are used in the product. Using comparison charts to try and convince potential customers to buy your product rather than a competitor. Display the ingredients if it’s a nutritional supplement or food product.
If you’re not very confident when it comes to infographics, there are professionals you can hire to create them for you.
4. Zoom In
Try to include some zoom-in images of your products so that customers get to see them from every possible angle. It also lets you point out important details that might not be apparent if the customer wasn’t able to get a closer look. Zooming in on products also allows you to sell the product in terms of design and quality. Close-ups will also help customers see what distinguishes your listing from others that are similar.
5. Include 3D-Rendered Images
Your product may have important benefits that are not apparent just from looking at an exterior image. A 3D cross-section will show off that feature better. It shows a customer how the mug can be used one-handed rather than just telling them. The customer is better able to understand how this feature works. It’s not something that’s going to work with every product, but can help customers understand a mechanism or product’s complexities.
6. Include Before-and-After Photos
If you’re selling a product that solves a particular problem, including before-and-after images for comparison. The customer can then see how a product could benefit them. Two images side-by-side can be very effective and provide proof that a product works. There’s nothing wrong with talking about a product’s benefits, but if you can show that benefit in action it will be more powerful.
7. Create Instructional Photos
Does your product have to be assembled or installed? You can show customers how it’s done with images. You’ll be helping them put the product together with confidence and reduce the chances of them giving up and returning it.
Dimensions
Images must be a minimum of 1000 pixels on each side. In general, the larger you make your images the better. This is because it allows your customers to look at a product in high resolution.
Format
JPEG (.jpeg/.jpg) TIFF (.tif/.tiff) PNG (.png) GIF (.gif)
Image File Name
Only name your images files with the product identifiers followed by one of the following file extensions:
UPC JAN EAN ISBN ASIN
If you use dashes, spaces, or other types of special characters in your file name, your image will not display.
Language and Text
You shouldn’t use promotional or temporal language in the copy of your listing. Similarly, you shouldn’t use it in your image. Phrases and words such as “sale”, “best seller”, or “limited time only” are not permitted. URLs are also prohibited. It shouldn’t really be necessary to say this, but there should be no offensive content in your listing images. How does the right image increase conversions? We are currently in an era of visual information and one in which visual data plays a massive role. You can improve conversation rates and ultimately sales by optimizing your images. In addition, optimization will make sure your images appear more frequently in search results and customers get to see your products more than ever. It will also help you build up a loyal customer base. To optimize your product images and increase sales you should:
Scale your images properly: In other words, you should make sure the customer is not confused about the product’s sizing. Include dimensions and additional product images. It’s also a good idea to include reference objects next to the product. Add important bullet points: These are key elements when it comes to boosting sales. There is the option to add important bullet points, but don’t let this additional text detract from the product itself. Image framing: Always place your product in the center when shooting images. When your product is placed at the middle point and there is equal space all around, it better impacts your customer’s attention. Take advantage of professional image editing services or tools: If you want your product images to shine, photo editing will be the polish they need. Raw images can look very dull. However, good quality editing helps to make your image look great whatever device the shopper is using. Product descriptions play an important role: Images are important but alongside there should be an engaging product description. Use bullet lists. Focus on benefits rather than features. Above all, keep product descriptions short and sweet.
Conclusion
About